Open a canvas at 32x32 pixels, some systems like Mac have a size limit of 32x32 pixels. I personally draw the cursors at 64x64 pixels on Windows 11 so it's clearer at a bigger size.
The brush size is not important unless you want it to be equal at a lower size. For example, if you're drawing on a 64x64 canvas, it will be better for you to use the 2x2 pixel brush. Once the cursor is sized down to 32x32 pixels, it will still be clear and maintain the scale.
So, if you want it to be clear on a bigger size, draw the bigger size first. See Step 8 > Notes for the screenshots.
Notes:
32 - 1x1 brush | 64 - 2x2 brush | 128 - 3x3 brush
48 - 1x1 brush or 1.5x1.5| 96 - 2x2 brush or 2.5
.cur files can go up to the maximum size of 128x128 pixels
.ani files can go up to the maximum 64x64 pixels
It might be possible to make a bigger size, but you will have to do your own research. Not 100% how you can make it.
Step 2
Draw whatever you like, as long as you have a clear idea of where you want the hotspot to go. If you plan on animating the cursor, it helps to keep separate layers of the cursor and art.
Notes:
I will not make an animation tutorial for this but, keep in my the FPS (frames per second) for your animation
I animate the cursors at 12 fps and use intervals 1, 2, 3, 4, 6, 8, 9, 10, 12.
Sometimes I'll use smear frames, squash & stretch frames.
Once you have finished, save as a .png or save as a .gif if animated. I personally make a folder for these files just so I keep track of them.
Step 4
Open the program or tool you're going to use to convert the files.
Step 5 - If you only want a static one, read up to here.
If you're using Cursor.cc locate the .png file, fix the hotspot, then download the cursor.
Then search 'Mouse Properties' and go to the 'Pointers' tab. Which will allow you to add your cursor, then 'Save As' & Apply.
You're done!
Step 6
If you're using RealWord Cursor Editor, locate the .png or .gif file. Click on the mouse outline cursor in the upper right corner. If you're making a .xcur file,
click on the 'Plug-ins' tab first and install the Linux XCursor Codec. It will allow you to save your cursors files for your system.
Notes:
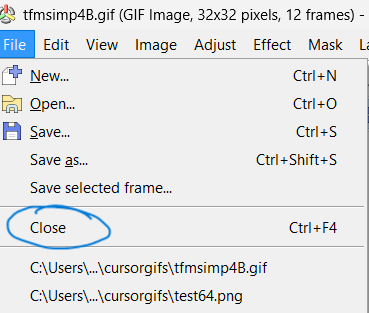
When you go to convert the files into a cursor file, it will open a new window. If you are not paying attention you might end up opening a new window in a window.
Like so, make sure to close the window every time. For the main window, close it via 'File'. Then you can click on 'Recent' or Open for the files you're converting.
Step 7
'Create mouse cursor' window will open and you'll see a drop list of options for Canvas size.
32 - default size | 32,48 - windows 7 | 32,48,64 - windows 11 (this is the one I use)
Step 8
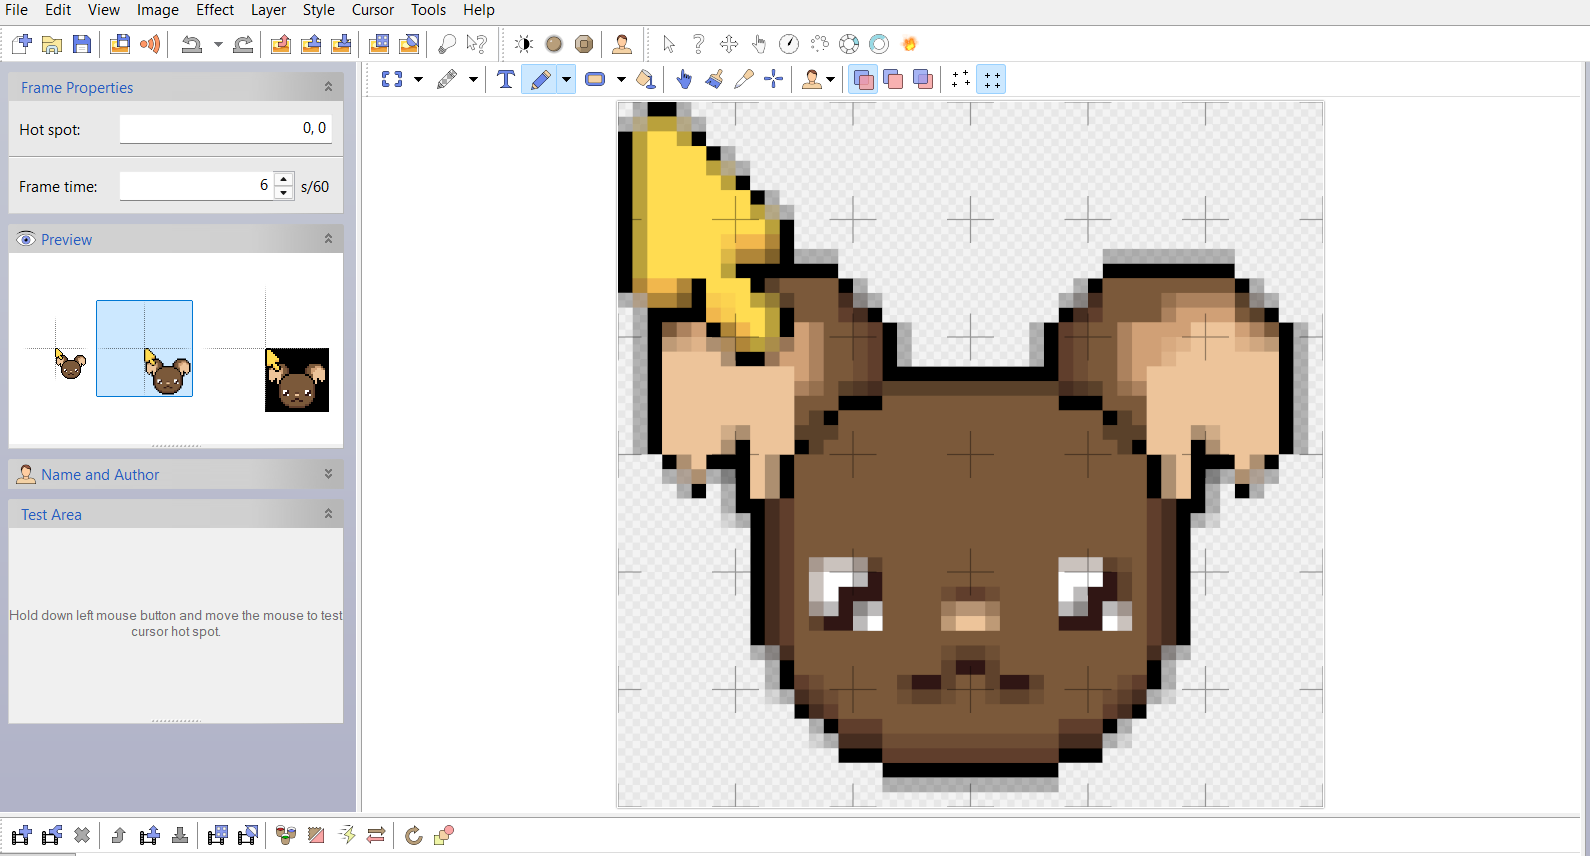
If you click on the option for windows 7 or windows 11, you'll see in the 'Preview' window on the left side. It shows the cursors with different sizes and resolutions. As I mentioned earlier, because I draw the cursors at 64 pixels with a 2x2 brush, the cursor will maintain the resolution at 32 pixels. It only becomes blurry at 48 pixels, if you want to redraw it at 48 pixels so it's clearer, you can if you want to. The size resolution will differ based on the pixel size of your computer.
Notes:
1920 by 1080 will use the 32 - default size cursor 2560x1440 will use the 64 - default size cursor
Below is 64x64
Below is 48x48
Below is 32x32
Step 9
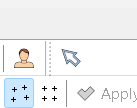
You'll see the Hot spot in the 'Frame Properties' window and the 'Test Area' also on the left side. You can drag the cursor to the hotspot or type in the number then press the 'Enter' key. You'll have to configure the hotspot for each size by clicking on them.
Notes:
You can change the hotspot for each cursor size. If you change 1, it will NOT change for all cursors. make sure it's in the same spot!
The hotspot area is 1 pixel less than the size of the cursor. Values are X,Y.
Cursor size - 32 /// Hotspot area 0,0 to 31,31 Cursor size - 48 /// Hotspot area 0,0 to 47,47 Cursor size - 64 /// Hotspot area 0,0 to 63,63
Step 10
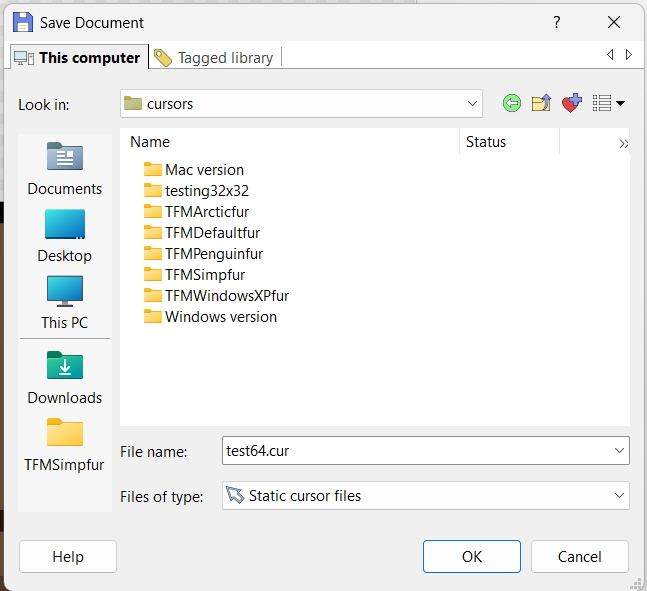
Once you've fixed the hotspot and tested them, you can export the cursor into the cursor folder or another folder you have.
Step 11 - How to add a cursor to your website
Locate the .png file of your cursor and
dd it in your website's the body style. body {cursor: url(Image file location OR Image link), default;}
If the image file was 'mouse.png', you add it like this: body {cursor: url(mouse.png), default;} or you put the image host link if it's from
Imgurr or Postimages.
If you want it to be a different cursor on 'hover', you will have to add the cursor url to that
specific style. Example: link a:hover{cursor: url(mouse_hover.png), hand;}
Bonus Content
If you want a button that changes the cursor on your website, you can get the script from here.